3DEqualizer Tricks of the Trade
Taught by Philip Maddock
- Duration:
- 4 hours 33 minutes
- Software Version:
- v4
- Launch Date:
- July 2015
- Course Number:
- 3DE202
3D
3D
This course, taught by Philip Maddock, will show you amazing tips and tricks to power through your shots when the deadline is looming. We will look at techniques such as using straightforward python to help out when there is little to track, along with 'tricking' the software into giving us great results when conventional approaches fail and constraining our results to the correct movement types.
Philip Maddock is an established 3DE trainer who is once again delivering an in-depth course, demonstrating invaluable techniques in this industry leading software. During his career, Philip has worked in mainly films and commercials, along with training artists around the world. Philip is currently working as a 3D artist at The Mill London and in this course is looking to build on your skills as a tracking artist.
Class Listing
Class 1: Utilizing python scripts for ‘markerless’ obje
We use simple python to create a free moving 3D object track to add a tablet device to a shot - when no tracking markers were used. This technique will also prove invaluable for ‘markerless’ 3D screen placements.
Class 2: Tricking the calculation to solve shots
We look into a typical problem, where only a couple of markers were used during the shoot but we require a full 3D camera move. We can ‘trick’ 3DE into thinking that we are working with a dynamic lens, when in reality we are actually reverse engineering the track to create a fixed focal length camera move. This is a really impressive technique that will make you stand out as someone who really understands the intricate logic behind this complex software.
Class 3: Using reference images to affect object tracks.
This technique provides super accurate results for all kinds of object tracks. In this example we will look at object tracking a moving motorcycle and achieving really clean animation which is vital for the wider CG process.
Class 4: Rendering dailies directly from 3DE
In the studio, every track needs to be reviewed in ‘daily’ sessions or screenings by your CG supervisor. It is so often the case that so much time is wasted by: exporting the track > rendering in 3D software > compositing. Why spend this time on this when we can accurately render directly from 3DE? This time can be spent on get through more shots! These renders can be used on your reel!
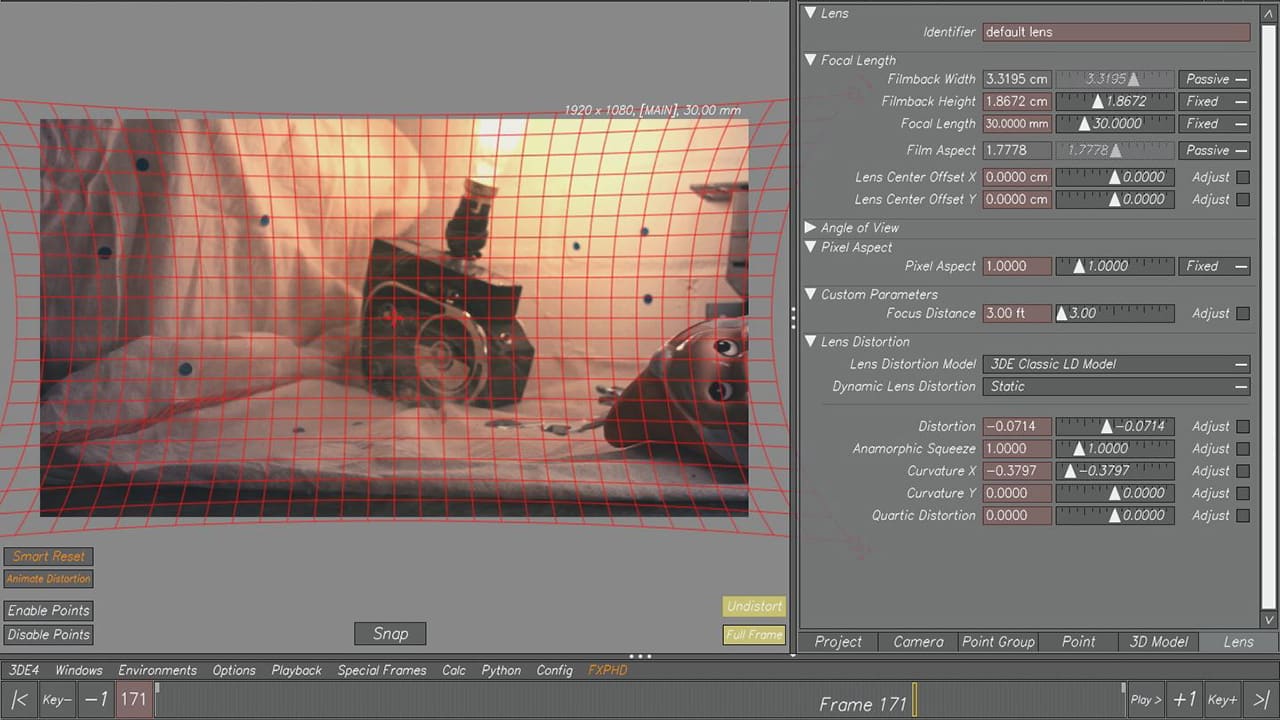
Class 5: Handling lens distortion and overscan
We will look at the whole pipeline! Calculating the distortion, exporting what we need and running it through external software. 3DE has internal solution for this...but we will look at a more robust pipeline. For the first half, we will be in 3DE4. The second half will be conducted in Nuke and Maya. If you wish to follow along, then please ensure that you have Nuke and Maya installed. You will also need the 'Lens Distortion Plugin Kit v1.8.1' for Nuke. This is free and can be found here: www.3dequalizer.com/index.php#?site=tech_docs
Class 6: Multi frame reference point placement
This is an amazing technique for accurately placing 3D points anywhere in your scene on (virtually) any object without actually tracking that point 2D! We can break our timeline down to influence our solution and set things up before moving into the layout phase in our 3D software.
Class 7: The sports zoom
Fast moving shot? Camera zooming in and out on the action? We will look into a ‘sport’s zoom’ shot which are very common in a TV commercials and can be a real hassle unless you have this skill under your belt.
Class 8: Constraints
There are typical camera moves that directors of photography favor. We will look at different camera movement types and how to work with them. We cover three shots, but we will focus mainly on the ‘circle constraint’. This is very common for ‘pack shots’ when we really needs to show off a product. Circular movement is difficult to tackle and we will discuss why certain constraints are so effective!
Class 9: Estimating lens distortion
We will look at a shot which has lots of lens distortion, but no lens grid was shot. 3DE can do a great job of ‘parameter adjusting’ for lens distortion, but what happens when we can’t get the right result and we need a solution that works? We will talk about how to ‘visually estimate’ lens distortion so we do not end up with ‘weird’ results at the compositing stage.