Advanced Matte Painting
Taught by Ludovic Iochem
- Duration:
- 8 hours 7 minutes
- Software Version:
- 7
- Launch Date:
- October 2013
- Course Number:
- NUK307
vfx
vfx
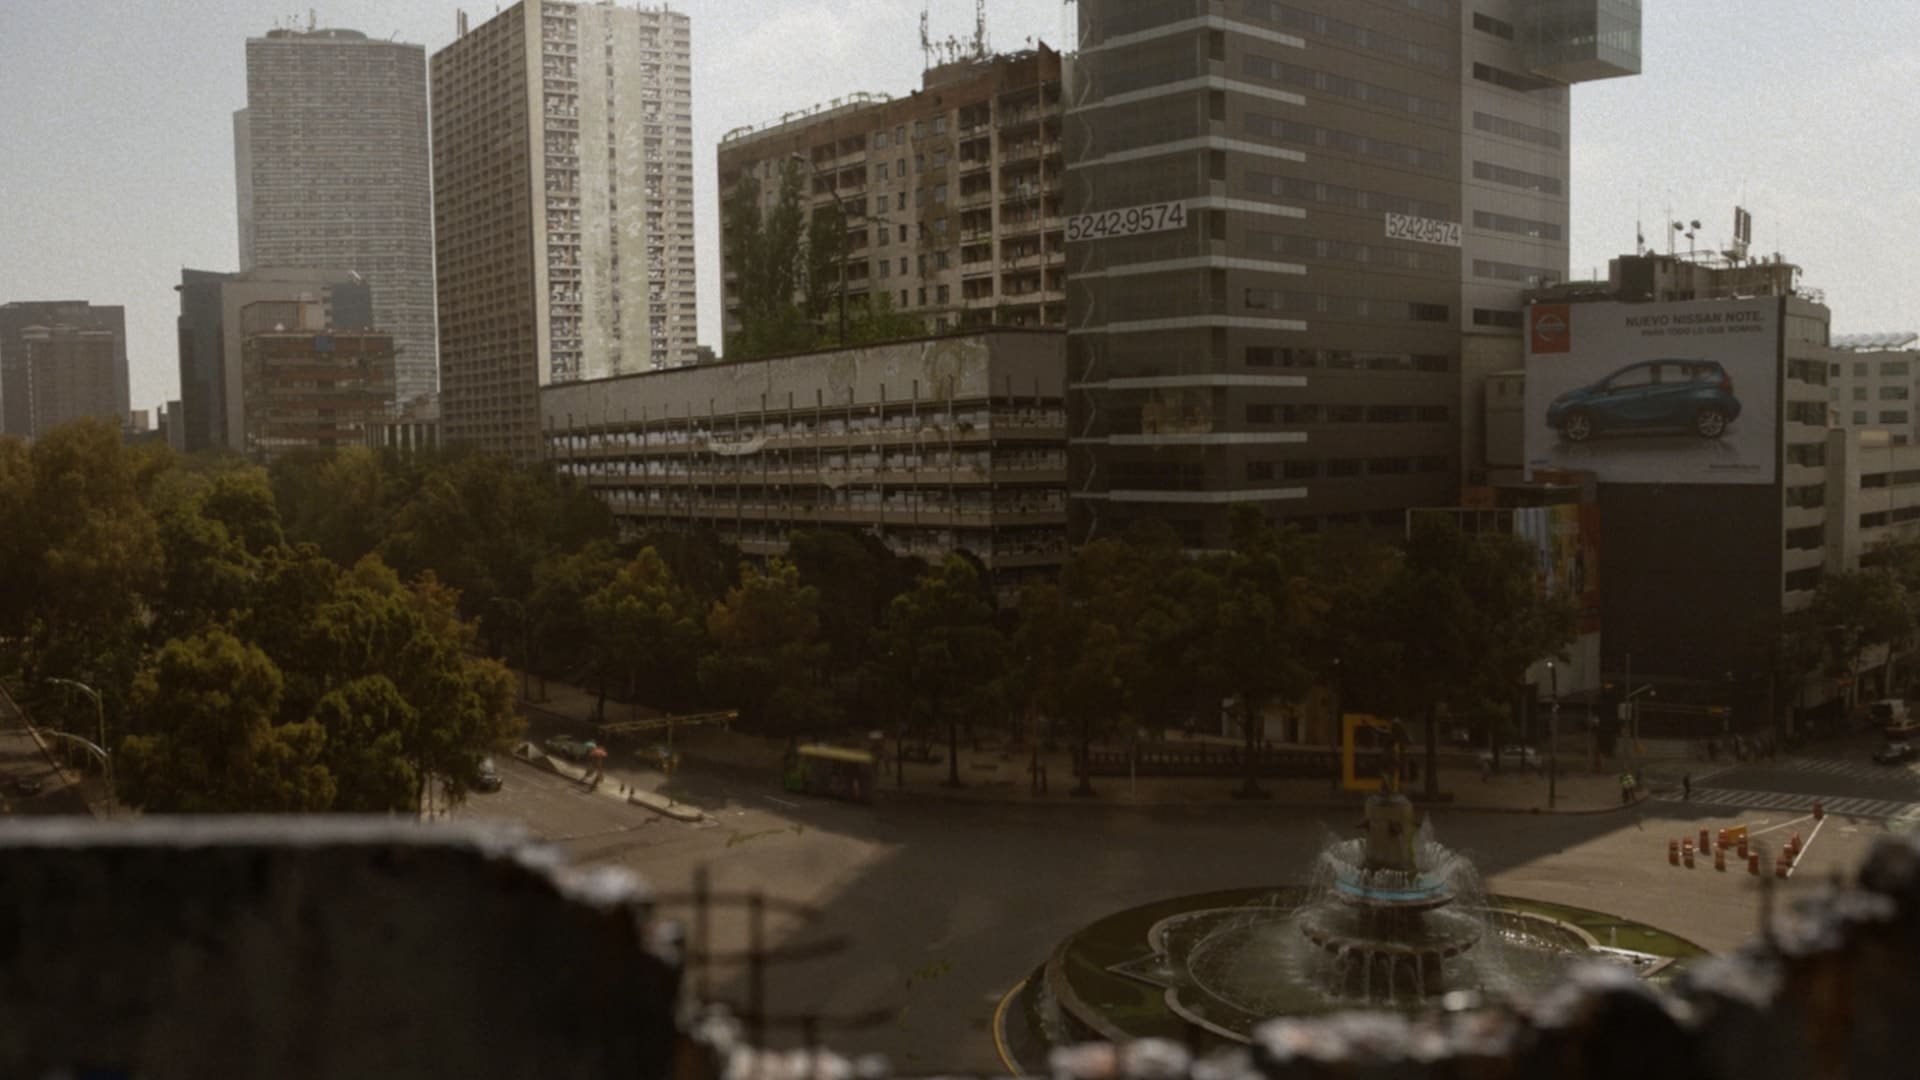
The course will start by examining the plate and sketch out a few concepts, and lay out several photos to see how we can fill this empty space to create a nice establishing shot. Then, as soon as the matchmove and camera is ready, we'll start to bring geometry into the scene to try to setup a nice parallax that will give enough depth and the feeling of realism.
Then, in the second stage, we'll be doing the actual Digital Matte Painting, and will go through the different techniques to get to the final quality to this digital environment. We're also are going to see how we need to work in order to give all the latitude to the compositing to address all the comments that could come up from the client.
Finally, we'll bring everything into NUKE, setup the projections, organize the script, and see how to deliver this 2.5D environment to compositing as we would do in a professional way. By doing this, the final matte painting will be prepped for use in the compositing pipeline, an important step in ensuring an efficient workflow. As this course is about creating high quality matte paintings, the final composite will not be addressed as part of the course and instead the time will be spent concentrating on the environment creation.
Ludovic Iochem is a Digital Matte Painter and Environment Artist, who has acquired his expertise in worldwide studios like Double Negative, Moving Picture Company, RodeoFX, MattePaintingUK and Prime Focus. His credits include big Fantasy movies like Hellboy 2, Prince Of Persia, Franklyn, Stardust, and Dredd, but also some more realistic movies like Bourne Ultimatum, Quantum of Solace, Unknown and The Tree of Life. Now back at Double Negative London, he worked as Lead Matte Painter on Les Miserables and Environment Supervisor for the new Marvel Studio movie Thor: The Dark World.
Nick Marshall is a Digital Matte Painter and Environment Artist who got his start in visual effects working on some small independent releases, before joining Double Negative as a roto and paint artist for films like Scott Pilgrim vs. The World and the final two Harry Potter movies - Harry Potter and the Deathly Hallows Part 1 and 2. He started working as a matte painter on Marvel's Captain America : The First Avenger, before going on to provide matte paintings for John Carter, Total Recall and Les Miserables. Having just completed Thor : The Dark World as a Lead Matte Painter, he is now beginning work on Gareth Edward's Godzilla.
Class Listing
Class 1
Concept and Blockout, Part 1. In our first section, it is all about blocking the general layout, based on the different sources that we are going to have (stills, ref). We setup a quick 3D environment in order to check in the matchmove how to make it looking realistic with the plate. The final stage for this part will be a rendered layout, slap-comped in Nuke with the plate. We use Photoshop, NUKE, and (if needed) Maya. Also includes bonus session on the city photography utilizing the Nodal Ninja with RD16 head.
Class 2
Concept and Blockout, Part 2.We cover the basic assembly of our what becomes our master environment setup in Nuke. We start by discussing the plate and taking note of anything that is of particularly important for the work that follows through the rest of the term. This moves into breaking down what has been provided by the matchmove team, before we discuss how to work with a simultaneous nuke and maya setup, and how to keep a fluid workflow between maya, nuke and photoshop. We end by exporting some roughly blocked-out geo into nuke to test the shot layout, and setting up a skydome. By the end of the class we have begun to start putting the first pieces of our environment into place to view in context through the shot camera.
Class 3
Concept and Blockout, Part 3.
Class 4
We discuss the modeling and uving of our final balcony element. We cover some of the thoughts and considerations that will drive the decision making process when working on 3d assets for matte painting purposes. This leads into a discussion about some different approaches that we can take in nuke when using full assets as opposed to basic primitives. We end by looking at the control we have to adjust the shot camera to show off our environment and craft a good establishing shot.
Class 5
Digital Matte Painting, Part 2.
Class 6
We will begin by discussing multiple projection setups in nuke and how these can be used to patch extra areas of matte painting. We will also discuss the importance of the relationship between camera focal lengths and matte painting resolutions, and how to use some of these rules to your advantage. We will then run through the setup of 3d lighting passes that will form the base for the matte painting, and look at some rendering techniques that will help us to have more control over the projections. These lighting passes will be brought back to nuke where we will set up the reprojection of our lighting passes, show how all our various elements are beginning to correspond to form the base for the final matte painting, and briefly discuss troubleshooting render issues with nuke projections.
Class 7
Digital Matte Painting, Part 4.
Class 8
We will run from start to finish through the process of doing the matte painting of the balcony. We will discuss the use of our rendered CG lighting passes and how by working non-destructively, we can essentially eliminate one of the major drawbacks of the matte painting approach - the inability to drastically change the lighting without major repaints. We will go on to cover the projection of our balcony matte paintings, and discuss the different ways that we can fix projection issues to give us the best possible final result.
Class 9
Projections in NUKE, Part 2.