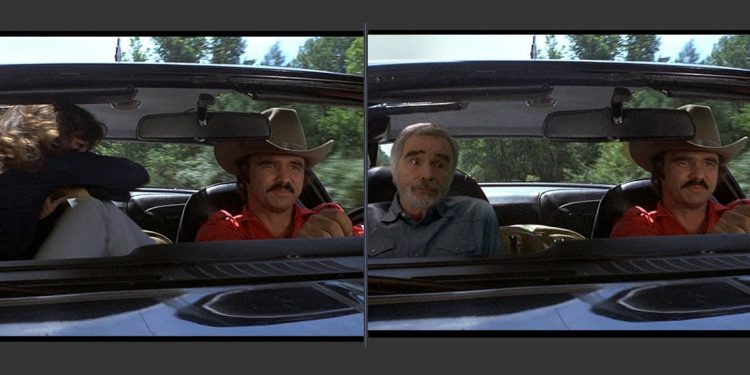
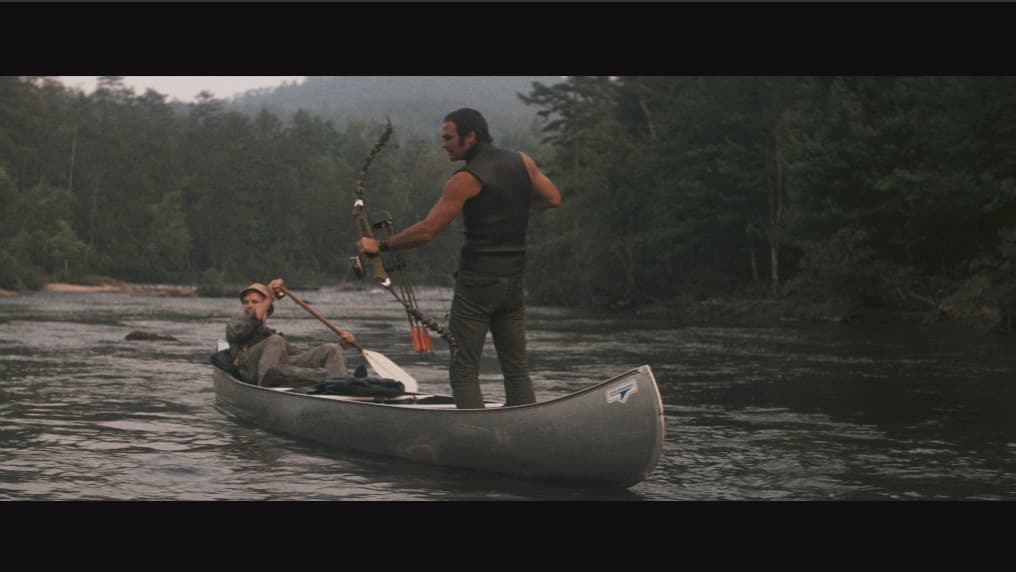
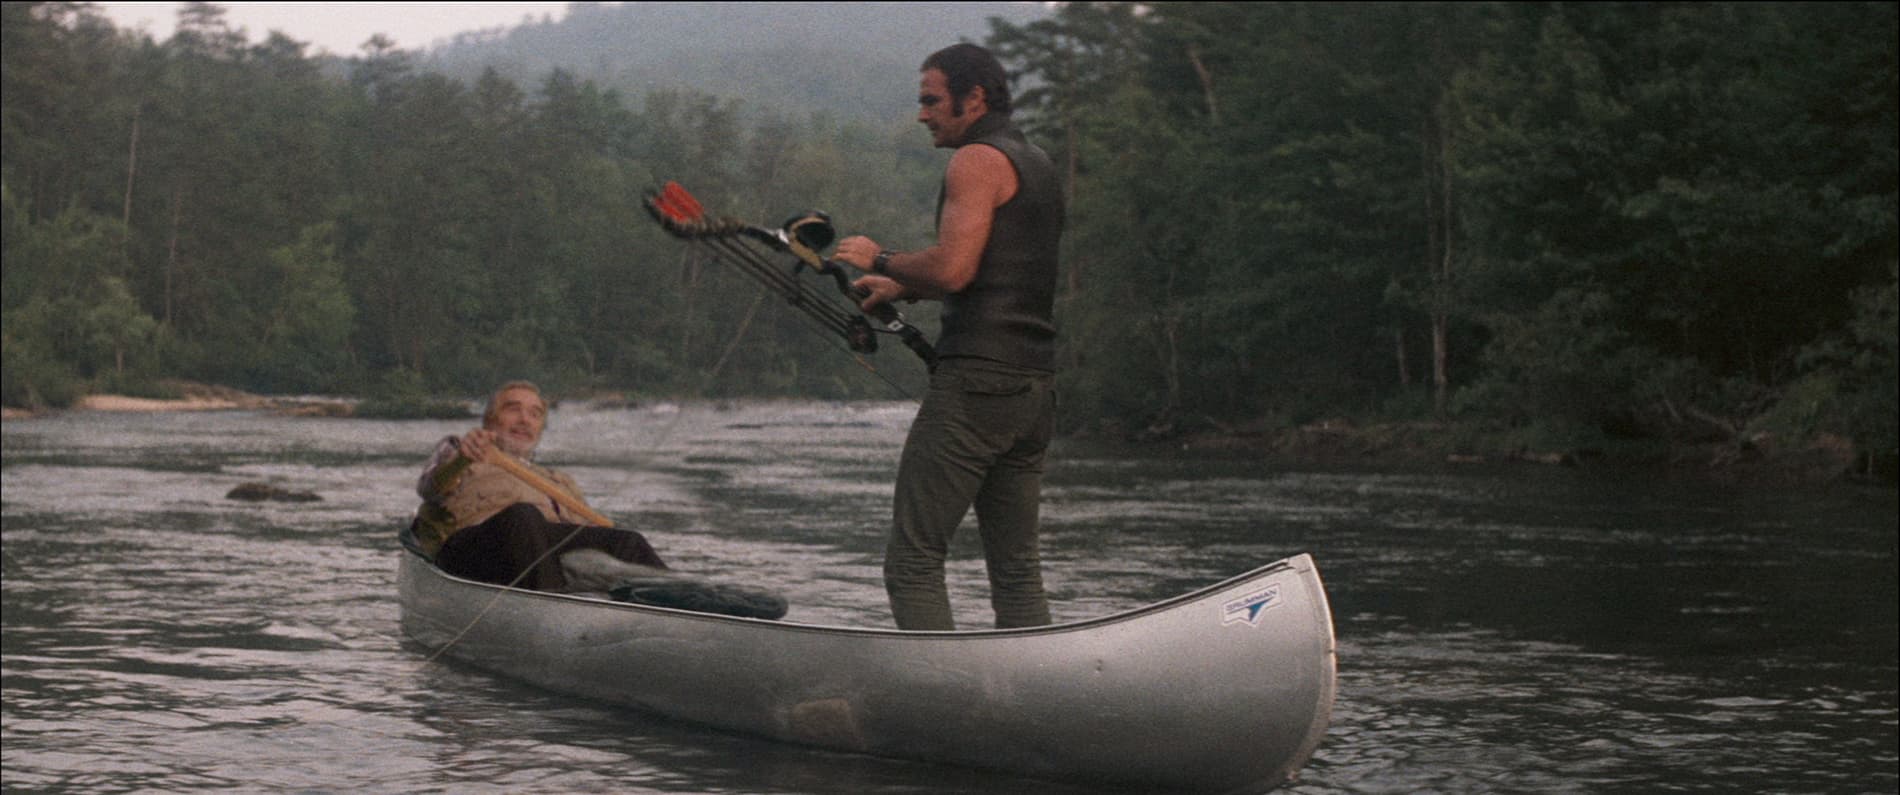
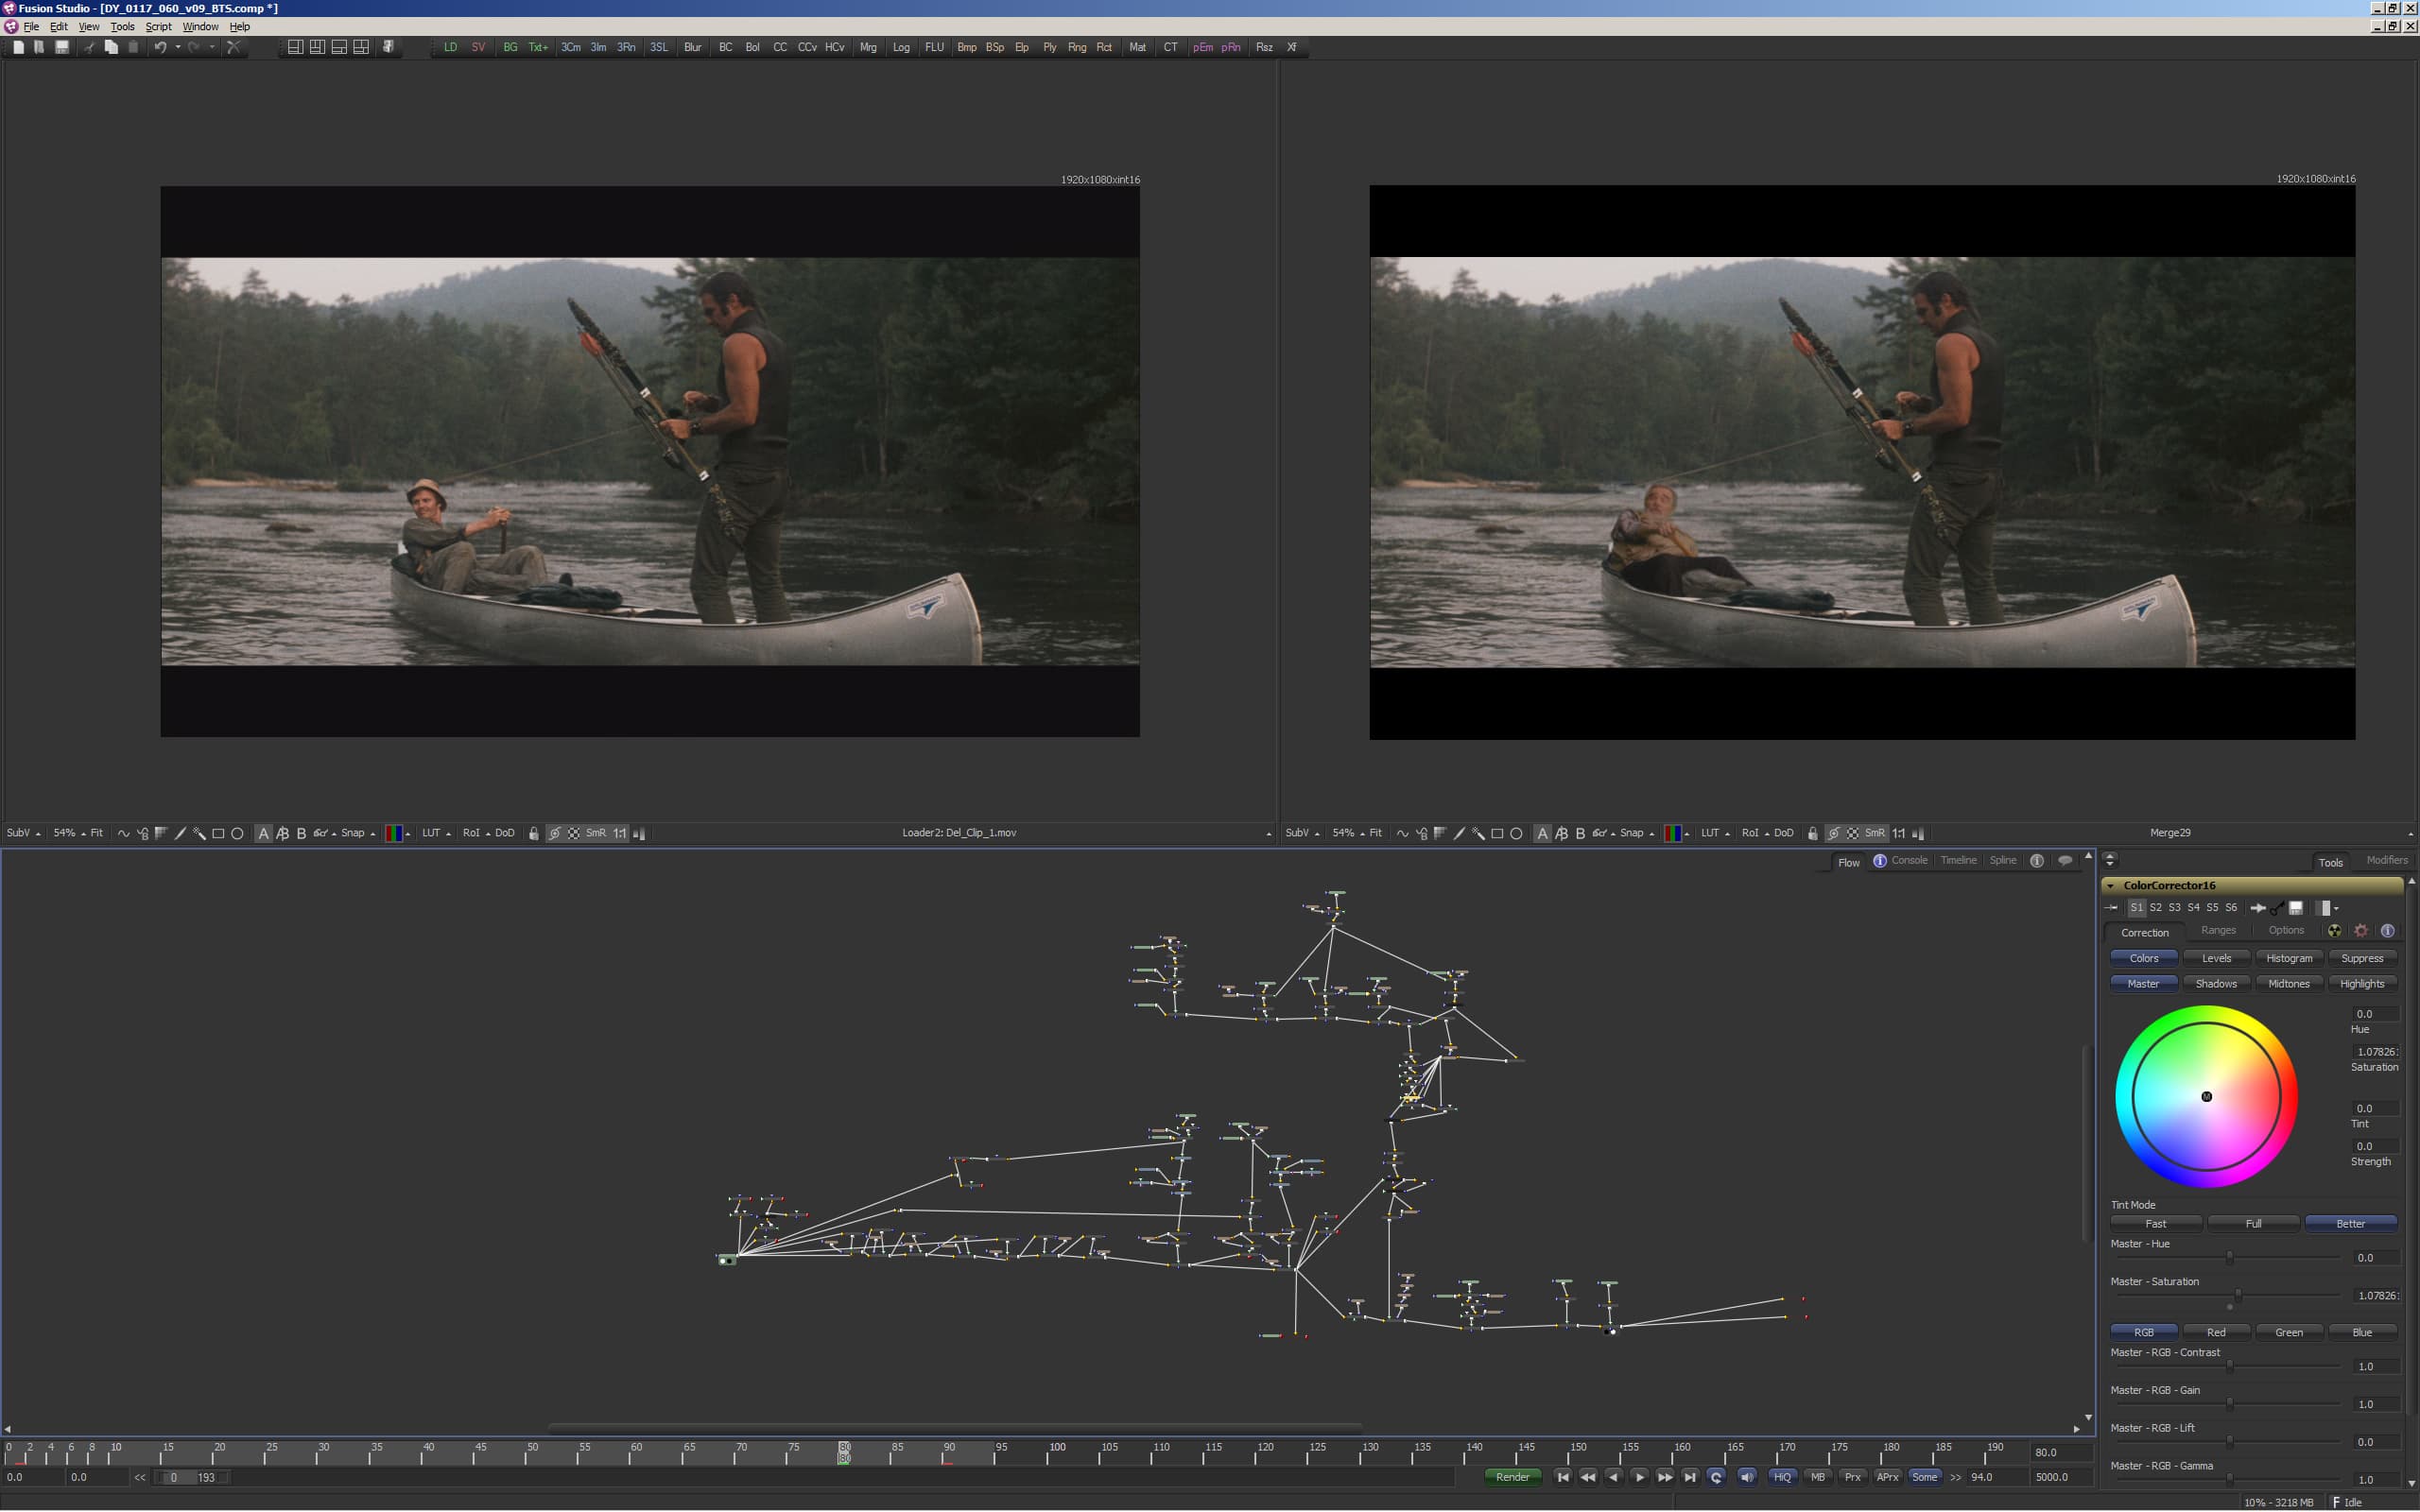
Fusion has grown in its use thanks to the development and new directions from Blackmagic Design. Trick Digital recently used it in the Burt Reynolds film The Last Movie Star. For the film, VFX Supervisor Adam Clark and the team at Trick Digital created complex VFX sequences that involved inserting modern day Burt Reynolds into notable scenes from his previous films Smokey and the Bandit and Deliverance. Much in the spirit of Forest Gump but with both Reynolds old and young in the same shot. We spoke to Adam Clark about why he uses Fusion and how Trick Digital handled the 300-400 visual effects shots over the course of about six months.
fxphd: Why do you use Fusion?
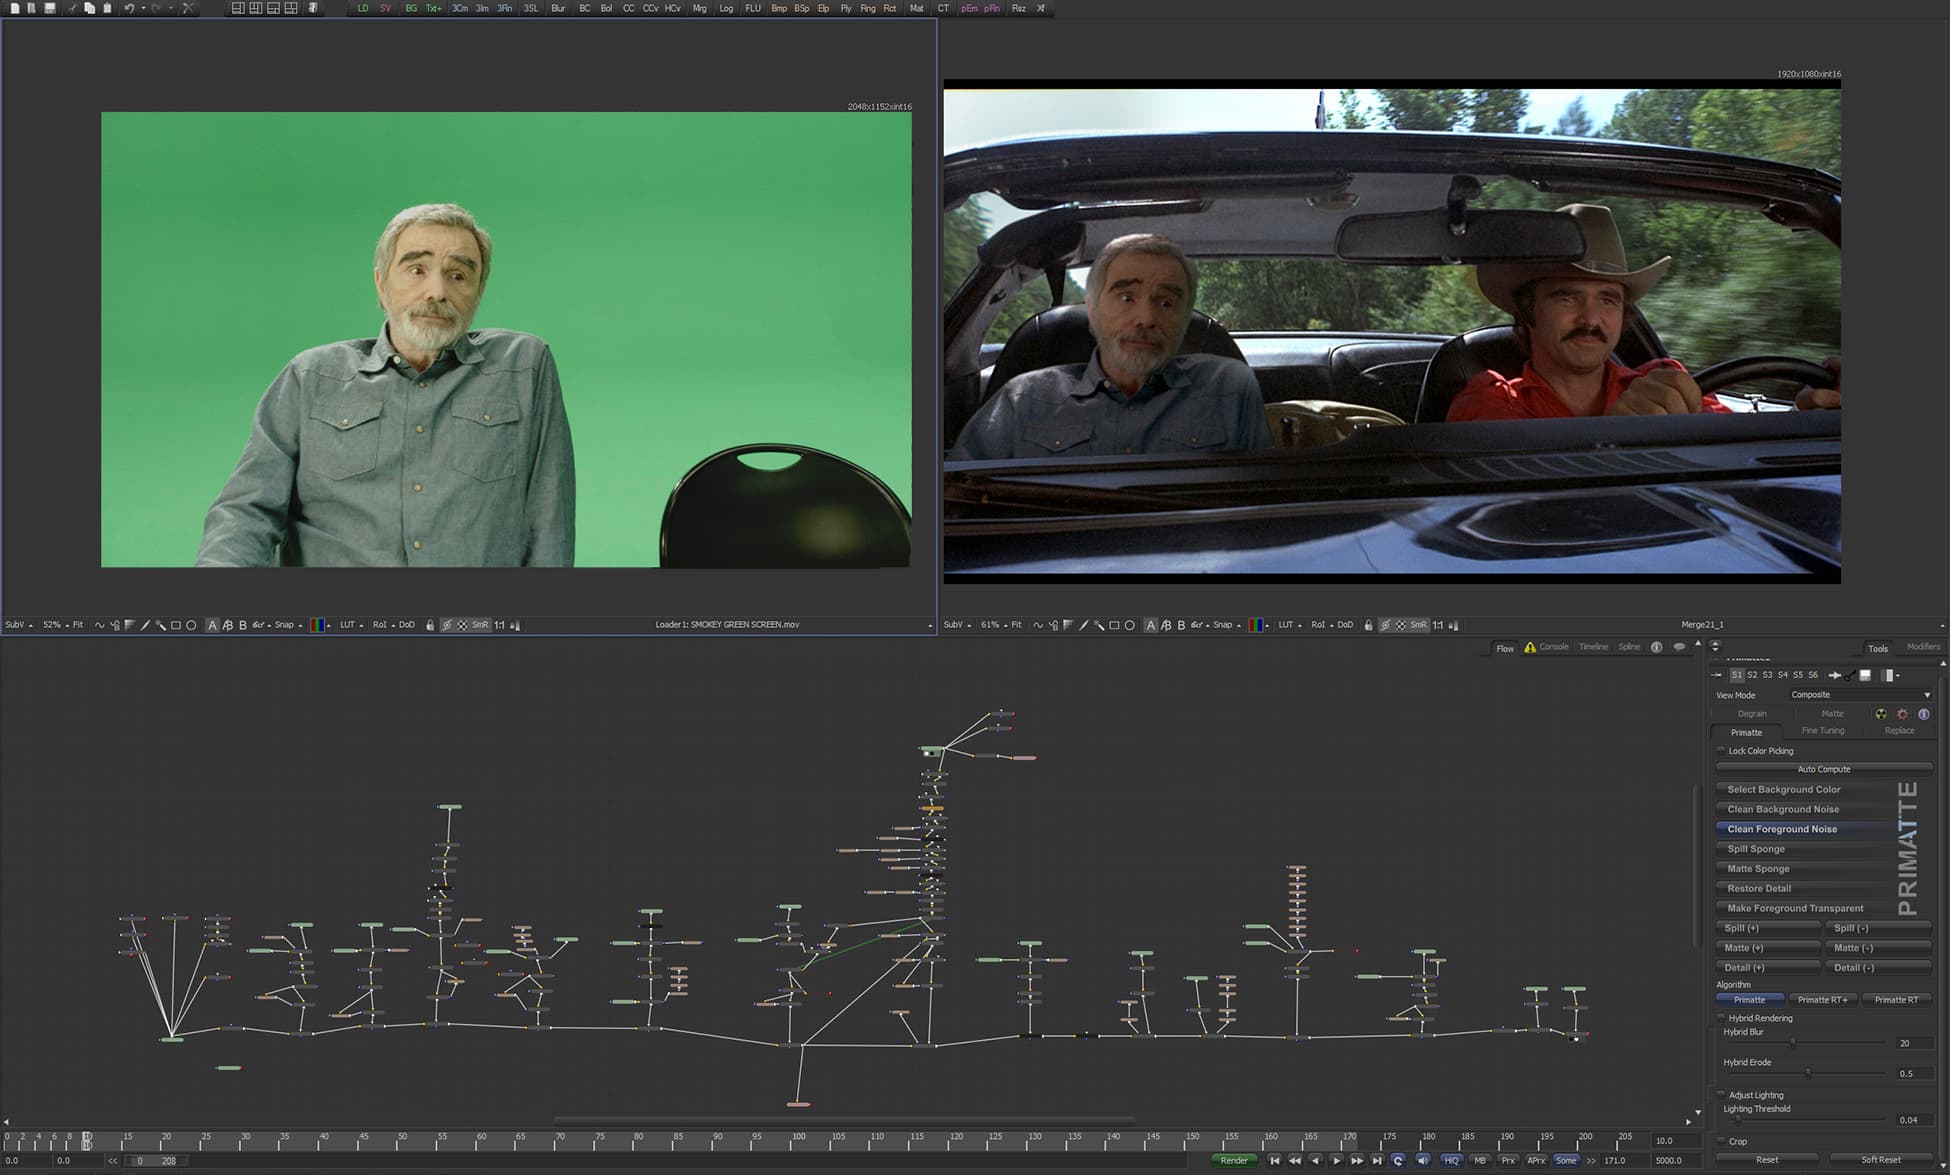
Adam Clark: We use Fusion for the power of the toolset and for its ease of use. In many processes, we can work, design, and experiment very close to the speed of thought and intention, versus using laborious linear workflows and arcane, difficult to remember procedures, and bouncing back and forth through multiple applications. We have node networks that we’ve created over the years that we reuse to cut down shot development time for many varieties of shots.
fxphd: What do you think is its strengths?
Adam Clark: Fusion’s strengths are the power of its node-based workflow, great performance, and how intuitive the application is to use. Being able to script and use Python is clearly huge for everything from creating custom tools, dynamically driving attributes, and speeding up laborious file system tasks.
We’re using Fusion’s 3D and particle systems increasingly more for tasks that we would have, in the past, otherwise reached for a dedicated 3D package. We like to stay as close to and work within the context of the final image as much as possible
fxphd: On these shots did you get an InterNeg scanned or a print of the source films?
We received 2K linear digitized scans that had been done some time in the past, I believe.
fxphd: Did you need do much to the source before adding the older Burt? ie. Grade or de-grain?
Adam Clark: We didn’t touch the source grain or re-grade in regard to the final image. We opted to match the grain via Fusion’s Film Grain and Grain nodes versus de-graining and re-adding grain. The grain, in both “Deliverance” and “Smokey and the Bandit” was significant enough, though, that for some tracking procedures we de-grained or blurred on a separate node branch used to generate the tracking data, and then just tapped into that resulting tracking data as needed.
fxphd: Can you discuss Fusion’s tools for matching grain and film properties?
Adam Clark: Fusion has some film specific nodes for matching grain and film properties. There are Log to Lin conversion options for log types, black and white levels, knee, film stock gamma, conversion gamma and the ability to use a specific conversion table. There’s also a light trim node that emulates film scanner light trims. We use the Grain and Film Grain nodes all the time, which have a number of settings for color of the grain, softness, size, roughness, spacing, power, log processing, time-locking, etc. that really provide all that’s needed to match any film stock.
fxphd: What was the approach on matching lighting, was this just done on set by eye or were you test comping on set etc?
Adam Clark: For both the Smokey and the Bandit and Deliverance sequences we opted to have it lit to allow us as much flexibility in comp as possible. Generally speaking, the key placement needed to match with appropriate fill, but there was no way that the on-set lighting was going exactly what was dynamically happening in the car, or in the canoe.
For instance, on some of the Smokey and the Bandit shots, ultimately, we needed the light flickering through the trees on present day Burt’s face as it did on Sally’s and the same way and time it fell across the original Burt element in the same frame. There’s no way that was going to happen physically on set with the precision necessary to match and make it believable – so the goal was to insure us a well lit and consistent image upon which we would relight in comp as needed.
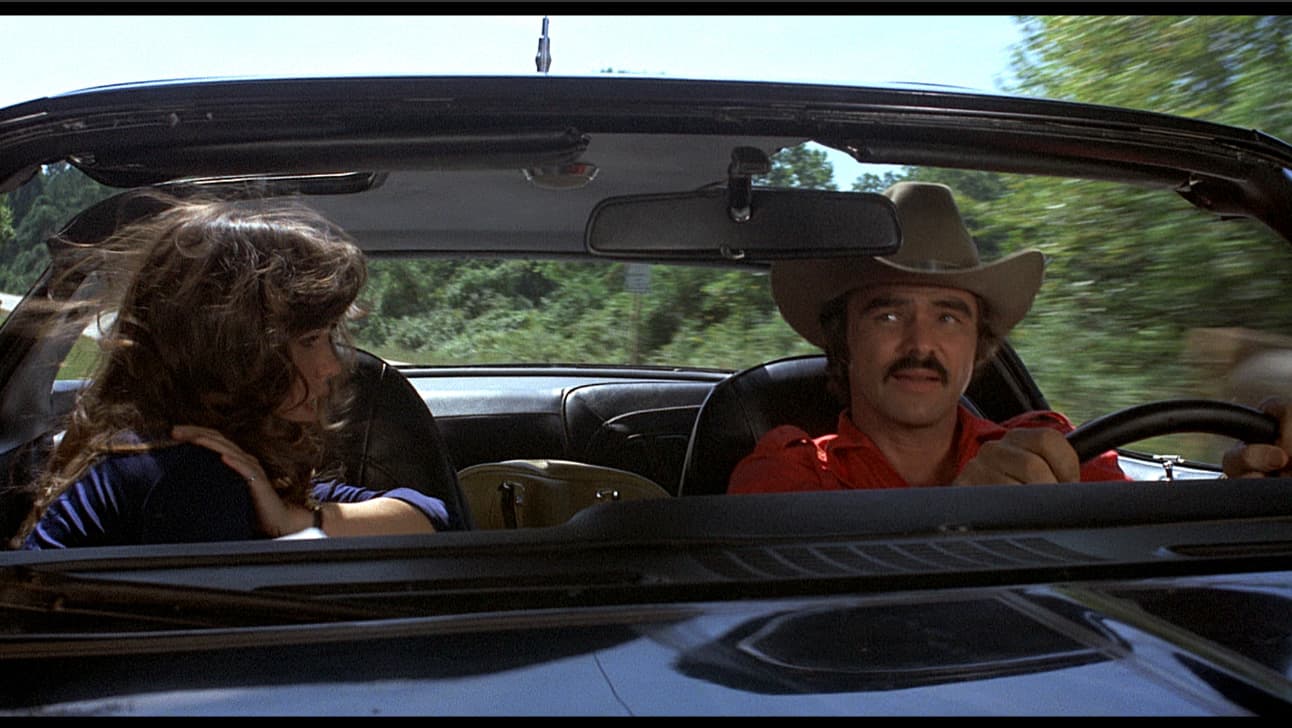

fxphd: Can you discuss the ‘rig removal’ of say Sally Field … did you ever need to add 3D for the back of the car, or was there always enough of the back of the car from various frames?
Adam Clark: Removing Sally from the frames required a number of techniques. The only camera motion in the original Smokey and the Bandit footage was vibration from the moving car. So in the car interior, relative to the camera, there wasn’t any meaningful parallax that would necessitate rebuilding parts of the car as 3D objects. We could use 2D techniques for that. For the most part, we’d find single frames of those pieces that were as free of Sally as possible and isolate those to use – if the elements were not completely clear of her, then we needed to paint out the remainder of her and track the object to be replaced in the car, and apply the motion from the track to the static elements so it moved correctly in space.
We’d remove the static grain from those elements as we needed to add the moving grain atop. For the front-wide two shots, the biggest challenge of the Sally removal was replacing the background road element as that was moving in perceptive and parts of the background would be at times visible and then obscured as it passed behind parts of the car and the actors. That was a combination 3D tracks and frame-by-frame replacement. Replacing the background meant though that we’d have to roto the original Burt element too.
There were other shots though that it made more sense to rebuild the car interior completely and replace the background road footage and add present day Burt versus trying to remove Sally and retain any of the moving original frame. In those cases, we used the various original shots from the original footage to create a car interior completely clean of Sally.
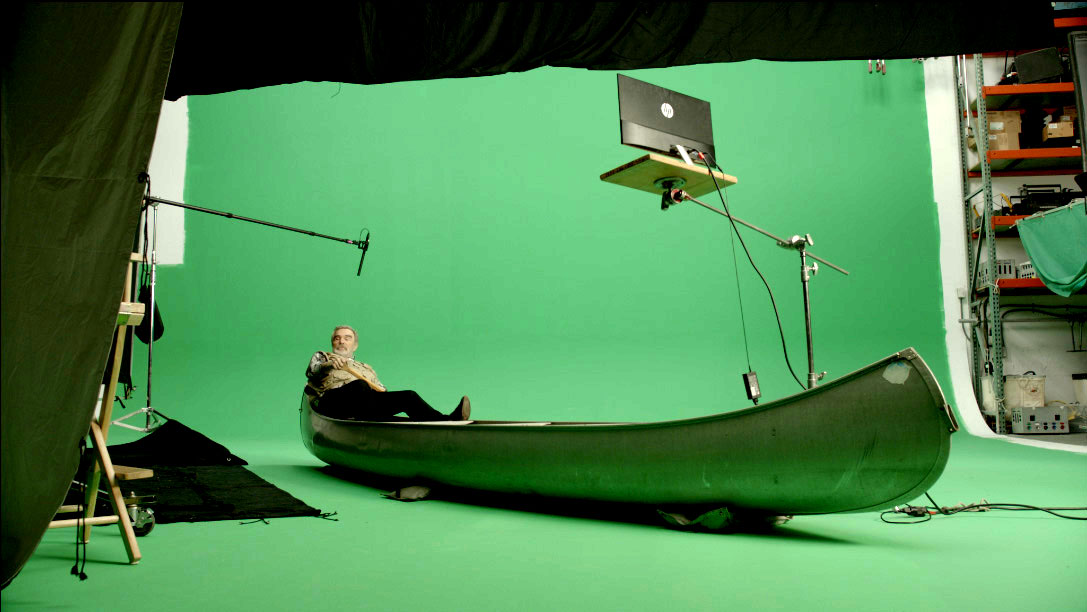
fxphd: I would love to hear more on matching the sway in the canoe sequence, was that just all tweaks in the comp? Could you discuss that more please?
Adam Clark: The canoe sequence had a number of different challenges than the interior car shots. We had to remove Jon Voight and get tracking data in both 2D and 3D from the scene as well as contend with the parallax created by the moving and shifting canoe. When the time came to composite the new Burt greenscreen footage, had we just tracked him to the overall movement of the canoe or Jon Voight, he would have felt pasted in the frame and not really in the boat, reacting to its movement as it shifted in space and on the river. Again, this motion was not something that could be matched on-set either.
So we opted to solve this by separating his body parts from the greenscreen footage into individual elements, painting in some of the parts that were obscured in camera, setting their rotation pivot points to where it would anatomically make sense, and manually animating a layer of secondary motion to Burt’s performance and the tracked data, so that he really felt like he was in the boat, and being affected by its motion and the rivers as well as the camera’s position relative to him. This created the subtle parallax as parts of his body obscured others and we could shift legs and weight naturally. While there’s only so far you can take this type of animation technique, I knew it would work in this case.